


Note before starting
If you're not comfortable enough with Spring Boot or the basics of the same, I'd suggest you go through my previous blog which gets you started on Spring Boot:
What do we aim at building today?
We'll be dealing with fetching data from an external API using our Spring Boot application.
You might ask why?
Sometimes we might want to reduce the application size on the frontend by pushing the external API calls to the backend or just reduce the amount of data passed on from the frontend to the backend.
Tools and Technologies we'll be using?
It would be great if you have the JDK package which includes the compiler and the JRE, but in case you do not have it installed you can do it from this link: (oracle.com/in/java/technologies/javase-down..)
I use Java 11 but any version of java above 8 should have you good and 11+ is preferred.
I personally like writing my Java code in IntelliJ Idea(jetbrains.com/idea) but you could use your favorite text editor!
- Postman, to test our API(postman.com)
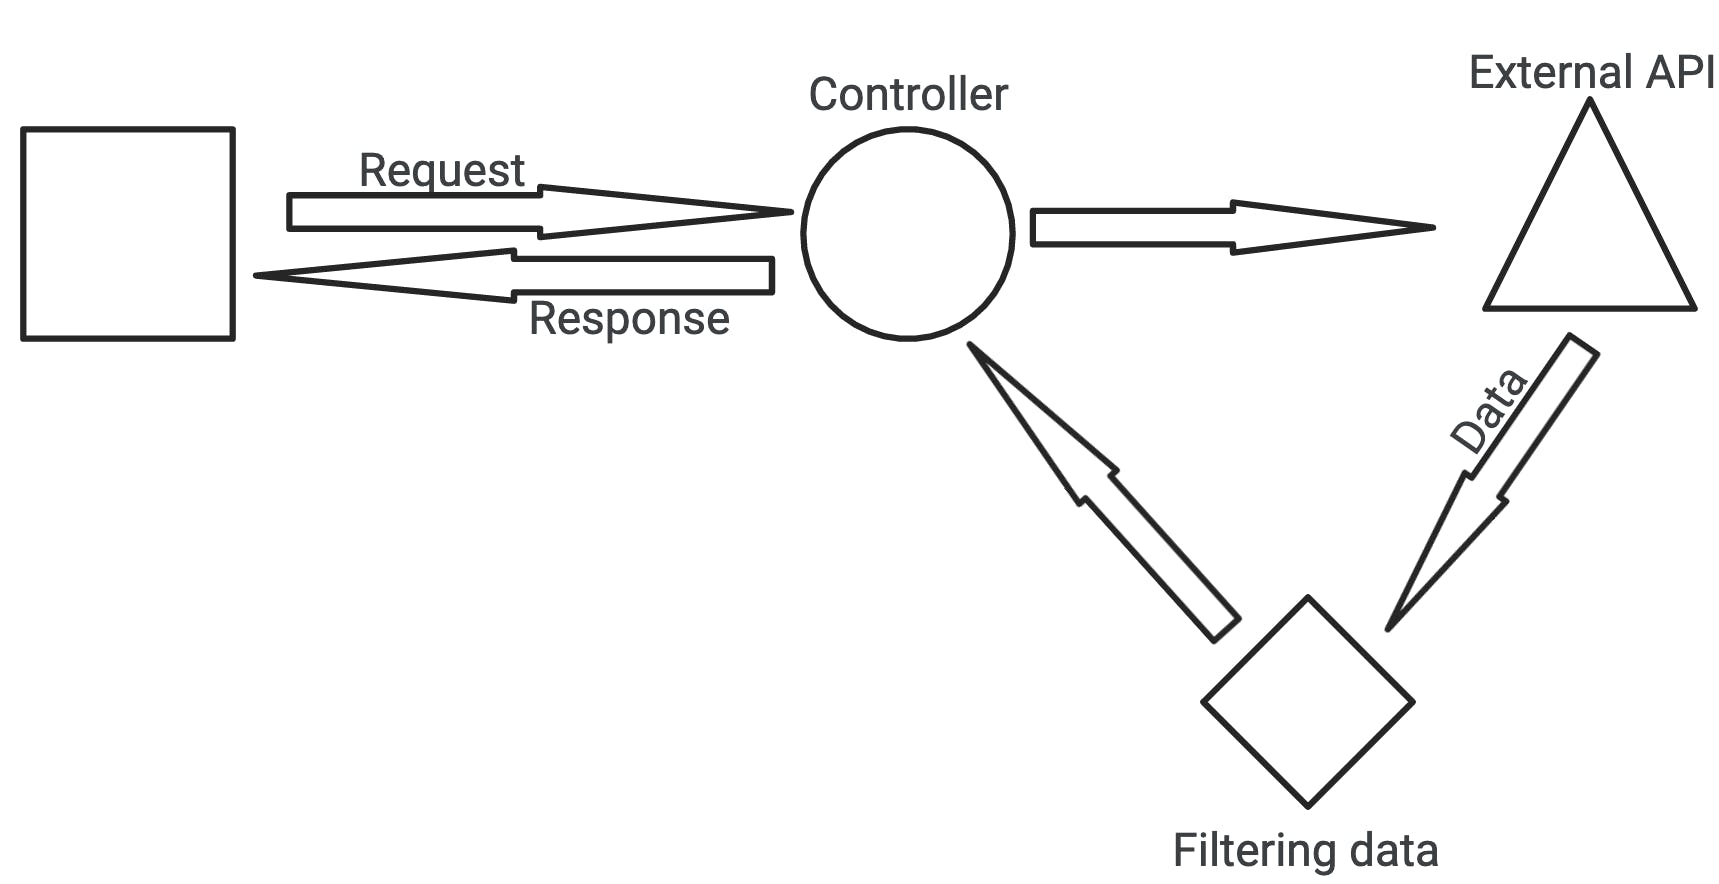
Application design
We'll be sending a request to our API controller. From here we will be calling an external API, deserialize that data and send that back!
Getting Started
So finally we're gonna start, yay!
Let's head over to start.spring.io and initialize our spring project by adding dependencies and giving the project a name.
You'll see a screen that looks something like this:
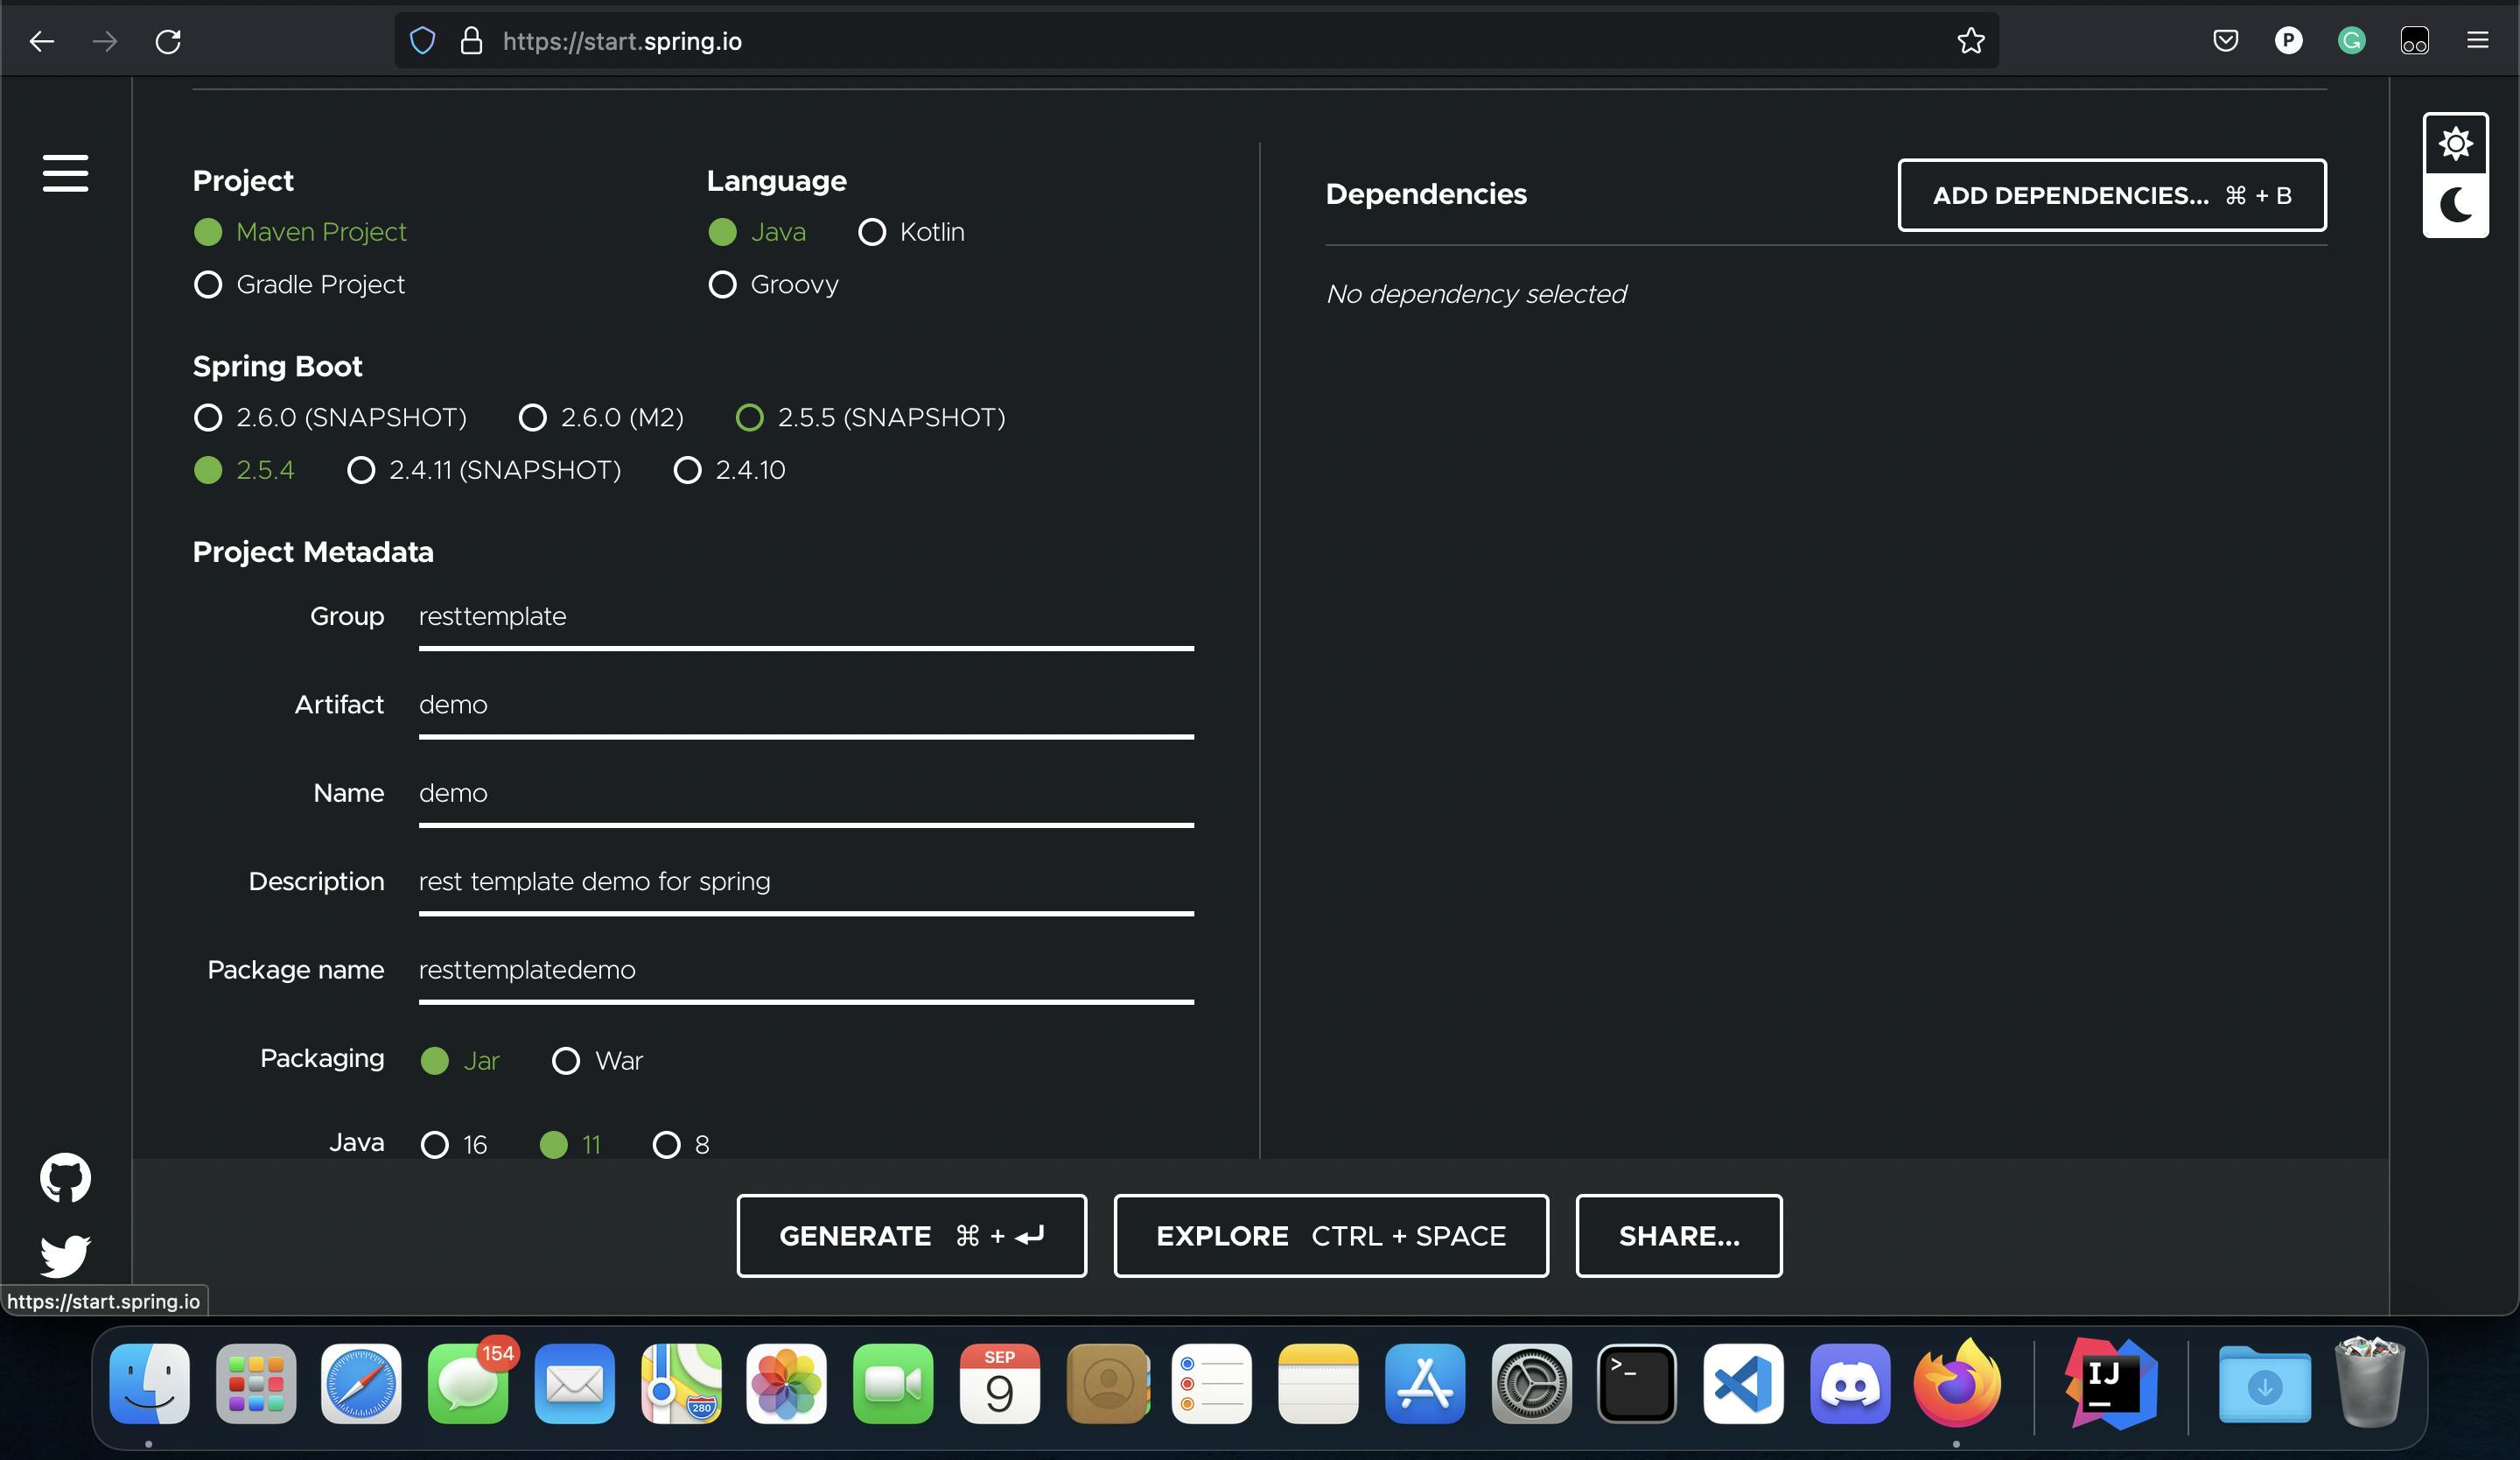
- On the left, topmost option for "Project" we're going to pick Maven. This will be our project's dependency management tool. As for the "Language", we'll be using Java.
- As for the version of Spring Boot, we'll be using 2.5.4 as it's the latest LTS release.
- We're gonna leave the project metadata to default but of course you can change the same if you'd like. I'm gonna leave it to default for this tutorial since it's our first project.
- For the packaging, we'll be using the JAR package.
- Pick the version of Java as the same you've installed in the JDK package above. Since I'm using Java 11, I'll be selecting the same.
Fun fact: JAR stands for Java ARchive
Let's get to the slightly more fun part, adding the dependencies. Click on the "Add Dependencies" button on the right-hand side to select the dependencies. You will see a pop-up similar to this:
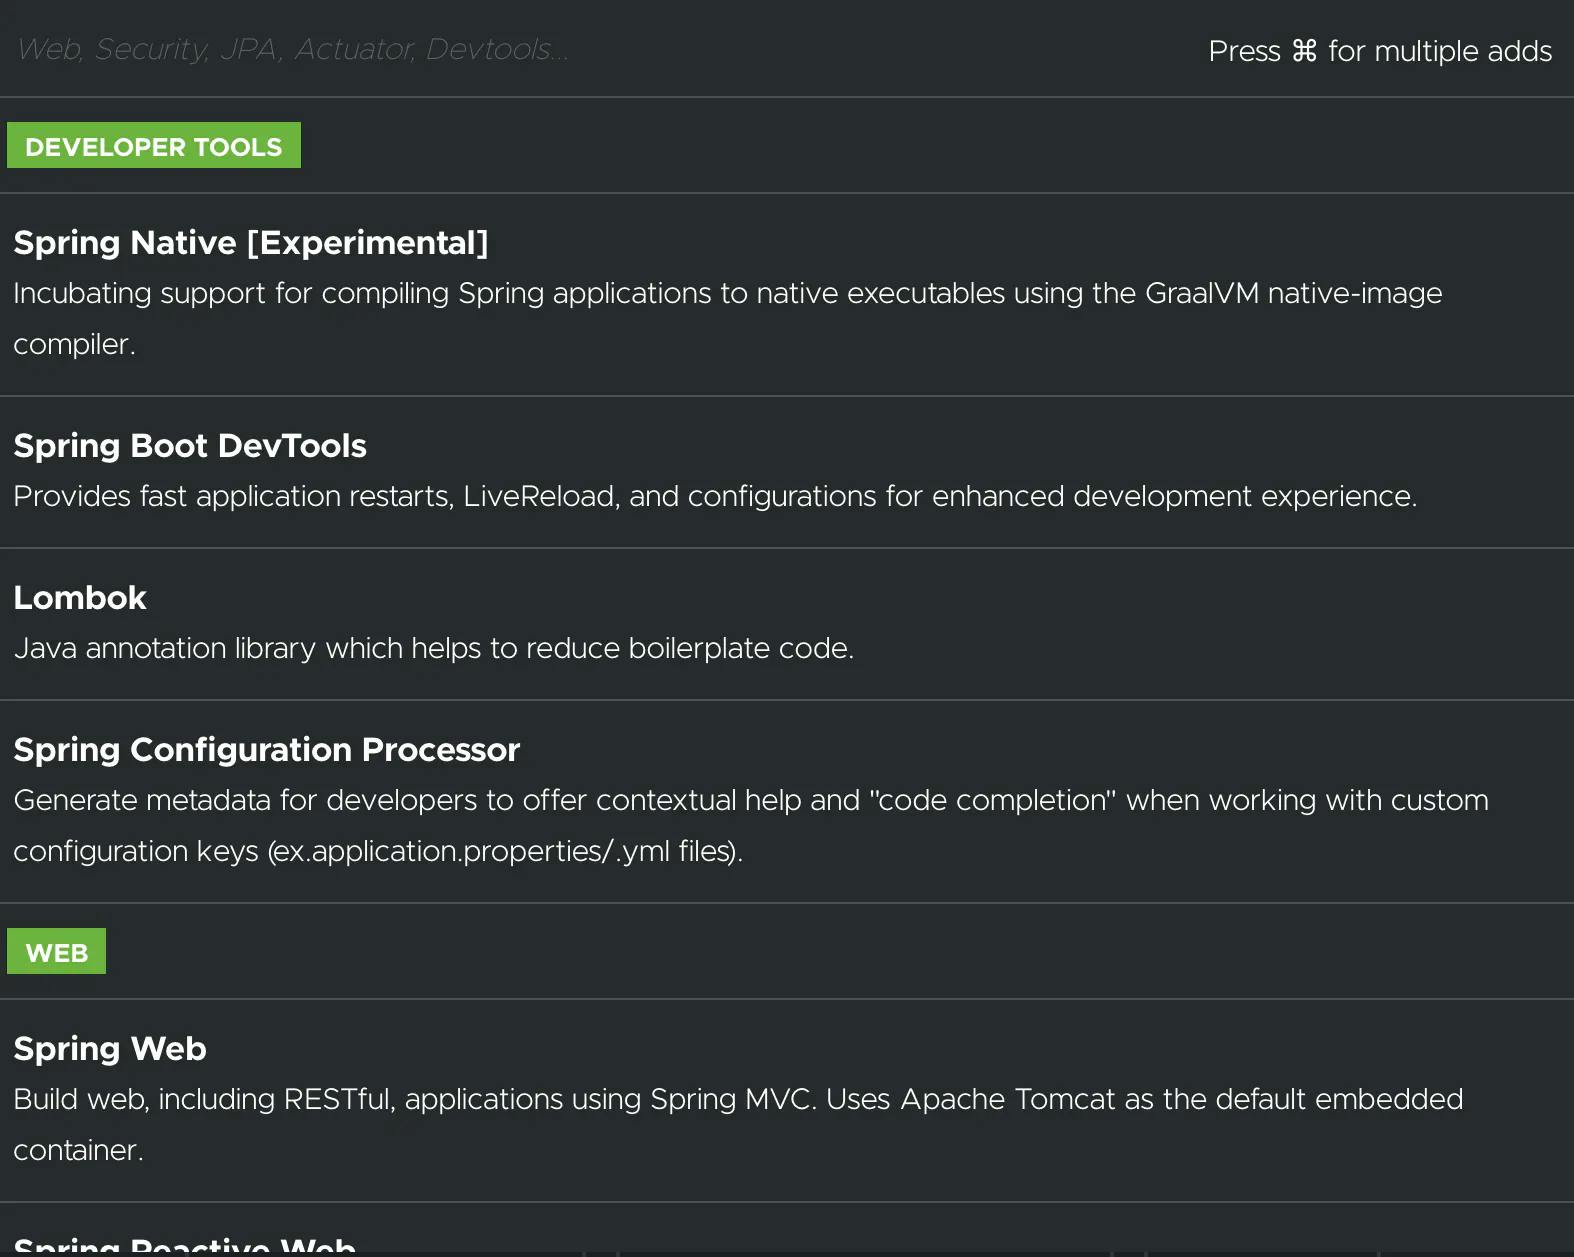
In Developer tools section, let's select:
- Spring Boot Devtools
Now if you scroll down to the Web section, you'll see a list of dependencies. We'll be installing a few of them namely:
- Spring Web
- Rest Repositories
Now click on the Generate button on the bottom left, your download of the JAR package should begin! Ta-da that is your spring application! It will install a folder with a .zip extension, so now all you have to do is extract it.
- On macOS, double-tap, and the folder gets extracted.
- On other OS, right-click and "extract here".
Open this folder in your favorite IDE now!
Note that since we're working on a simple web API, we'll be only installing those dependencies. But feel free to explore!
If you're stuck in the dependency installation, here is a link that has all the settings configured to Java 11: start.spring.io/#!type=maven-project&la..
Understand the project folders and files
There are loads of folders and sub-folders and files in the project, do you need to understand all of them? Nope, we're gonna go through a couple of files and folders which you will be working on in this tutorial.
This is what your folder structure will look like:
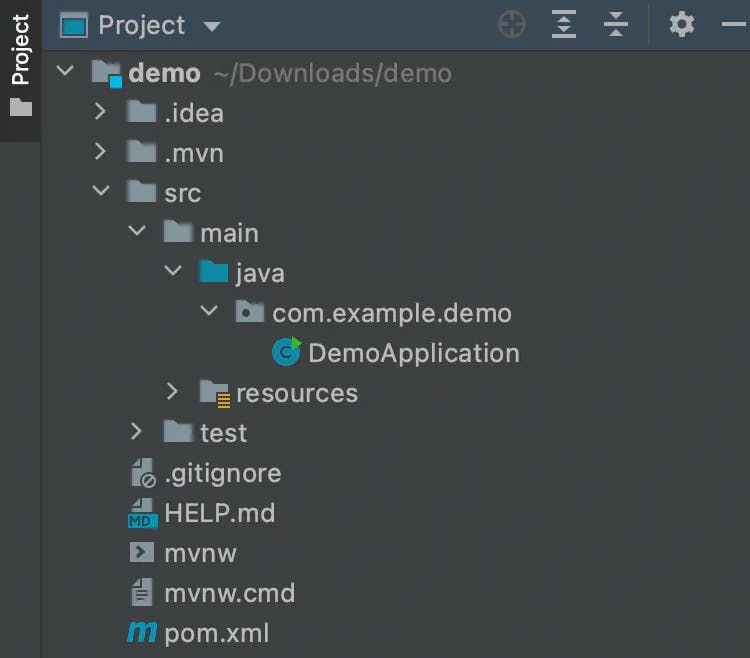
- pom.xml: Here lie all your dependencies, whenever you want to add more dependencies, you go in here and add it!
- src->main->java->com.example.demo->DemoApplication: This is where your Spring application starts.
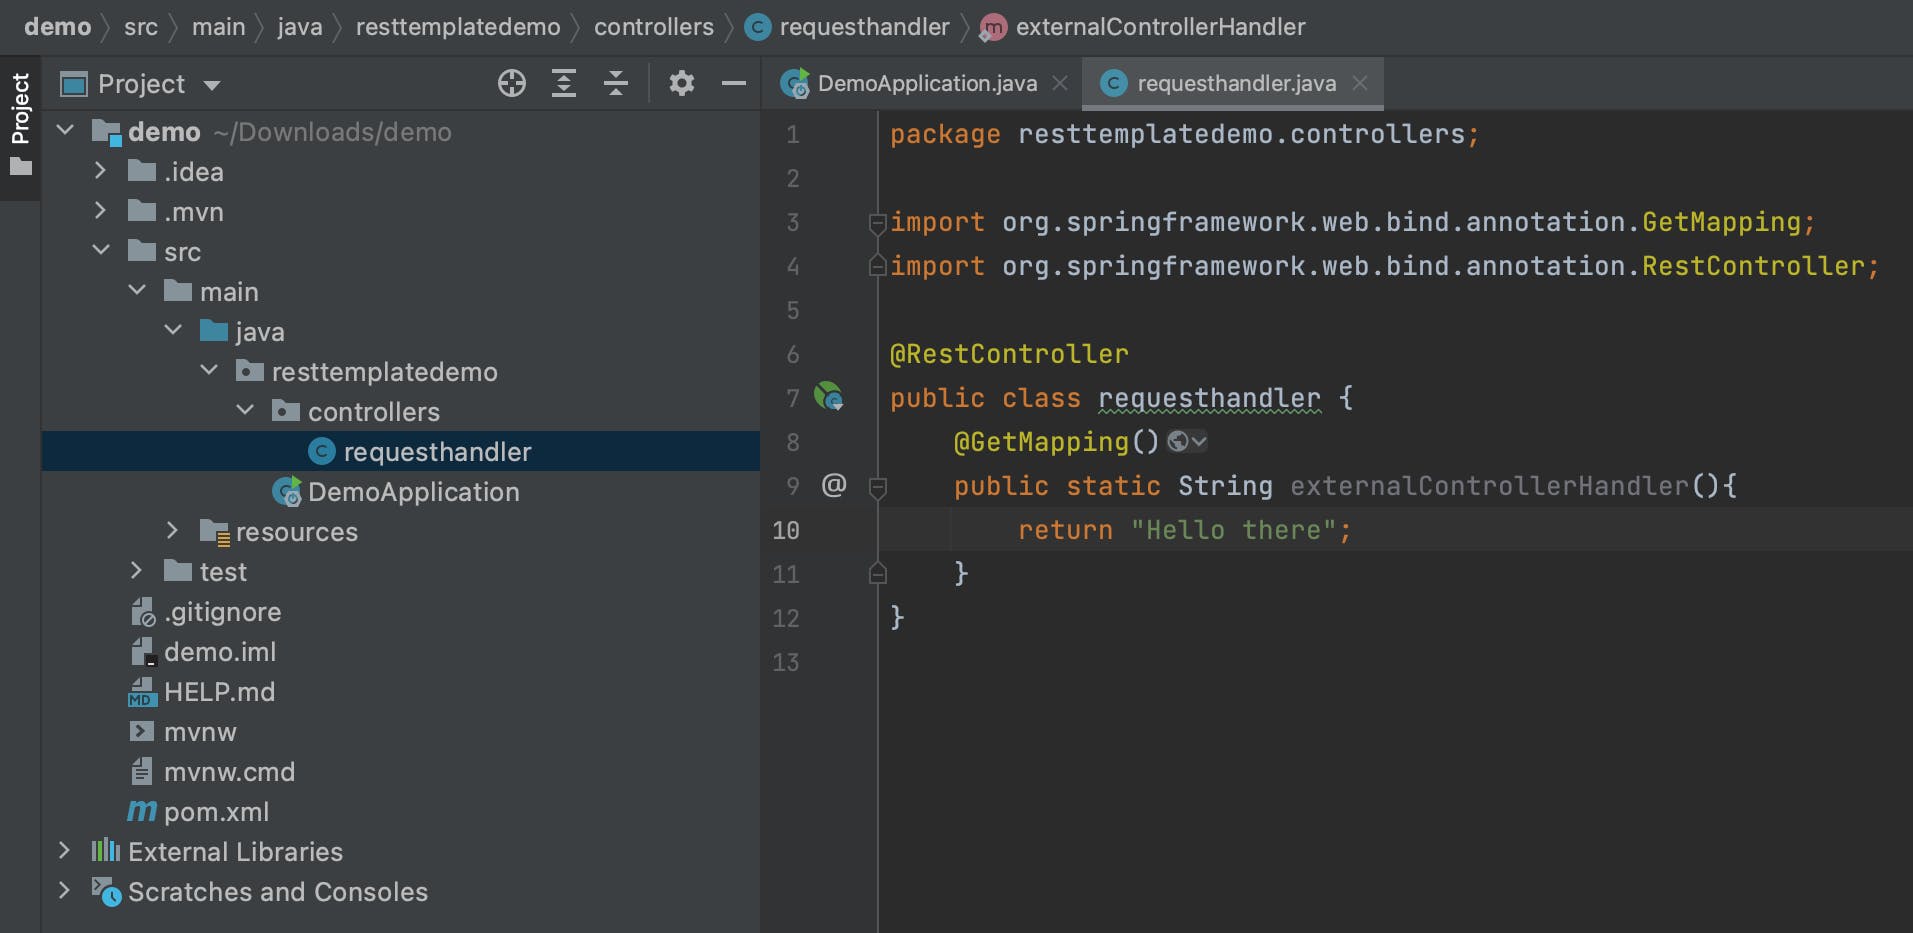
Creating a controller
Since you're already familiar with controllers, I'll go ahead with making a GET handler real quick.
If you aren't familiar with controllers check out my previous blog: prathamkrishna.hashnode.dev/the-guide-to-yo..
So now I'm going to run the app and test out my API controller at localhost:8080 in Postman!
And here's the result:
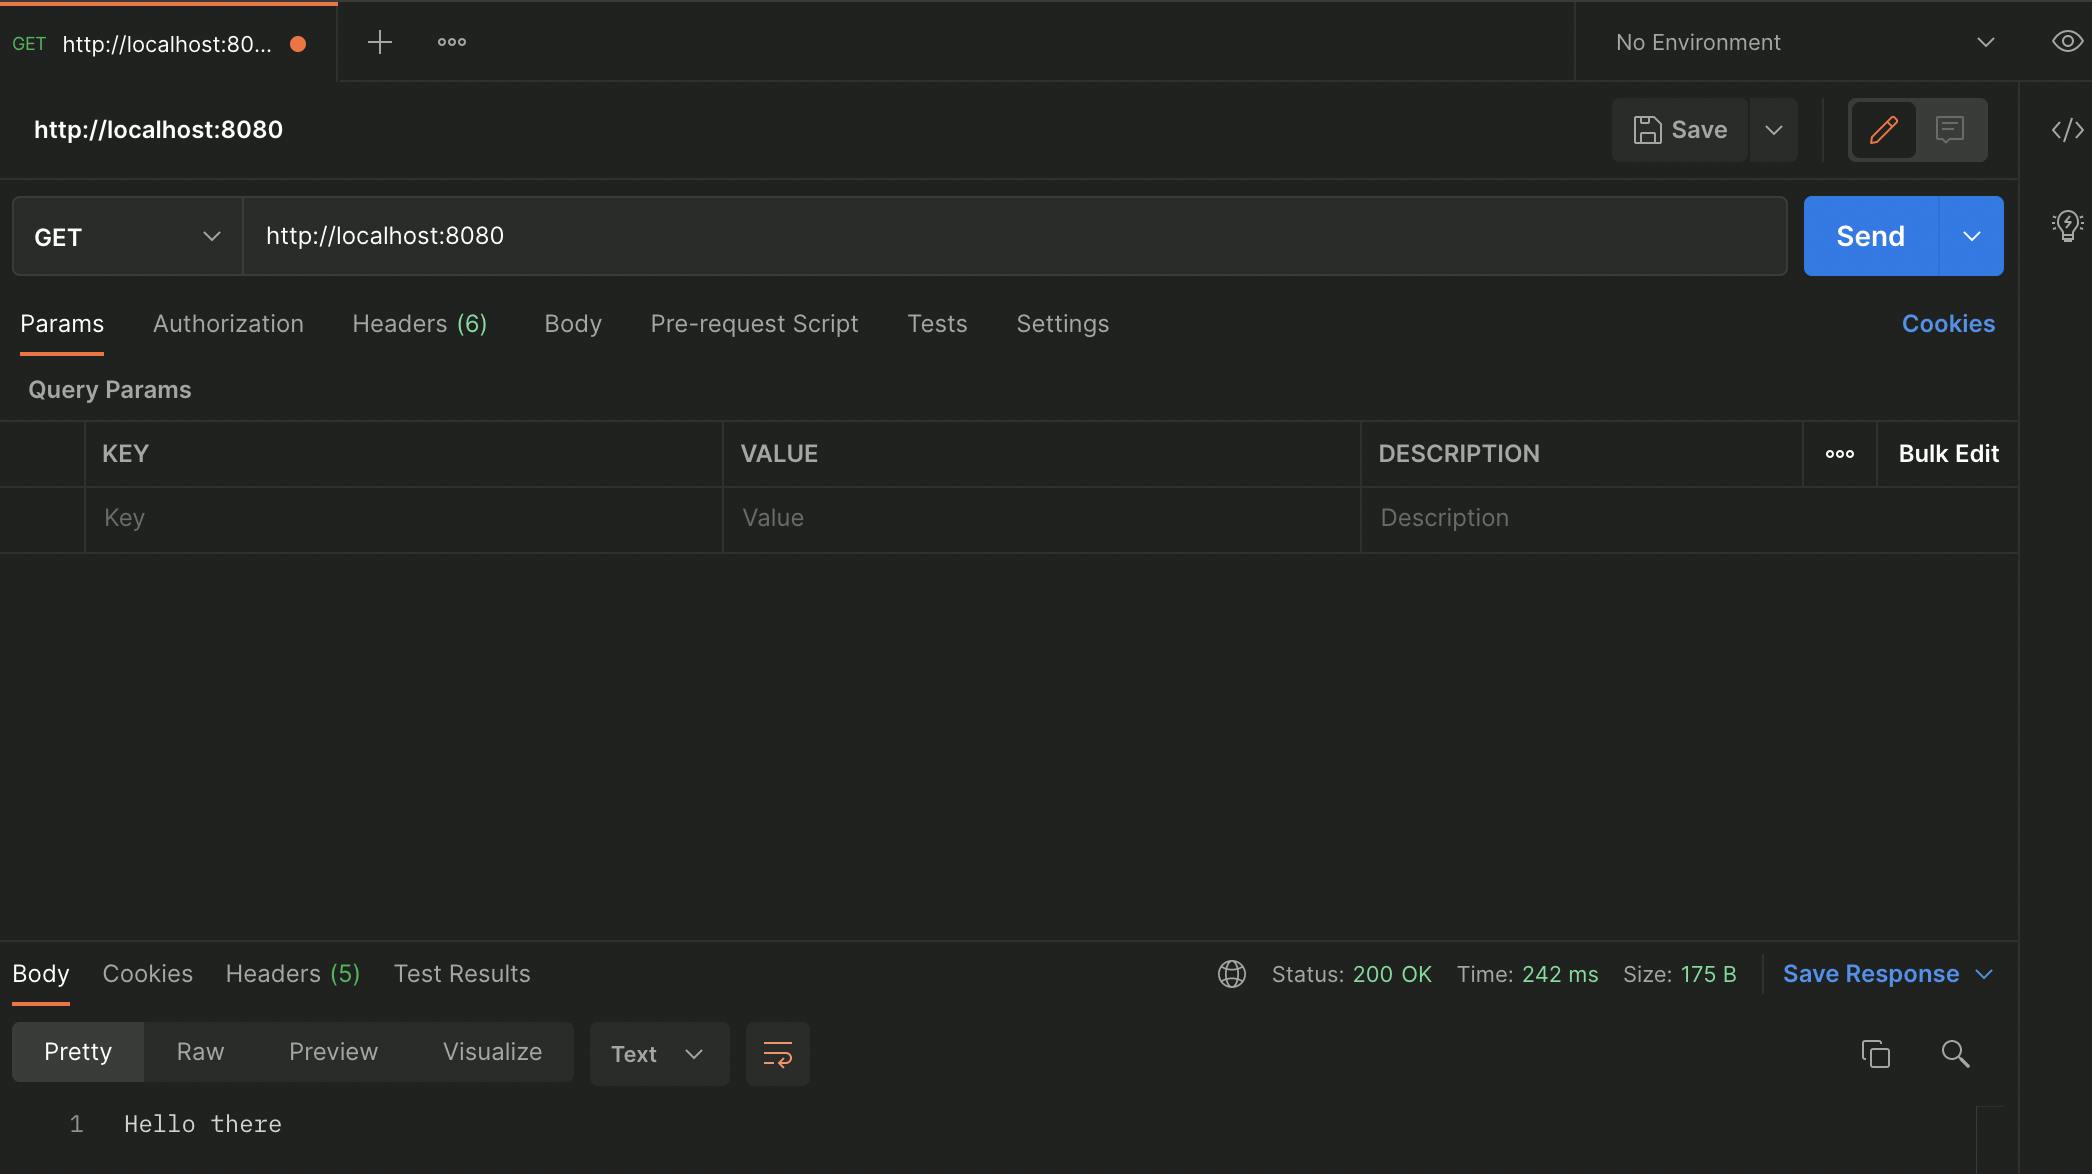 Cool, so everything works perfectly fine!
We have 2 methods of calling an external API, restTemplate and WebClient and we'll go through restTemplate and touch upon WebClient.
Creating a RestTemplate
We'll be using Spring's built-in class RestTemplate to call an external API. Let's create a new package called Services and create a new class called externalApiCall.
We'll be using the following API to fetch some data: randomuser.me/api
Let's store our API URL in a private field so it is safe and protected and not easily accessible.
private static final String apiUrl = "https://randomuser.me/api/";
The
finalkeyword is used so that the method's/data's value cannot be changed later. Quite literally final ahahaha 😄
Let's create a method called fetchUserData which returns a JSONObject. So, our method will look something like this:
public static JSONObject fetchUserData(){
}
Here comes the fun part!
We'll be creating a new instance of the RestTemplate class and we'll call it restTemplate.
RestTemplate restTemplate = new RestTemplate();
Let's create a GET request now by using our restTemplate instance.
restTemplate.getForObject(apiUrl, JSONObject.class);
Let's wrap this in try-block to catch if there's any problem while making the API call! We will be using the Lombok library to log any error. Additionally, let's return the data we are receiving from the external API.
try {
    return restTemplate.getForObject(apiUrl, JSONObject.class);
} catch (Exception abc){
    log.info(abc.getMessage());
    return null;
}
So we have our method set up! Now we have to inject the Lombok properties into our externalApiCall class.
Let's add the Lombok annotation at the start of our class:
@Slf4j
public class externalApiCall {
   //...code
}
So now our class looks something like this:
@Slf4j
public class externalApiCall {
    private static final String apiUrl = "https://randomuser.me/api/";
    public static JSONObject fetchUserData(){
        RestTemplate restTemplate = new RestTemplate();
        try {
            return restTemplate.getForObject(apiUrl, JSONObject.class);

        } catch (Exception abc){
            log.info(abc.getMessage());
            return null;
        }
    }
}
We're almost done! Let's head back to the requesthandler class in the controllers package we had created earlier and call this method and return the value!
@RestController
public class requesthandler {
    @GetMapping()
    public static JSONObject externalControllerHandler() {
        return externalApiCall.fetchUserData();
    }
}
Here,
externalApiCallis our package wherein thefetchUserDataclass exists.
Aaaanddd we're donee! 🥳
Let's test our API now!
Run your spring project with the following command on the command line:
./mvnw spring-boot:run
Let's send a GET request to localhost:8080. On hitting SEND, you'll see JSON data displayed on the response section!
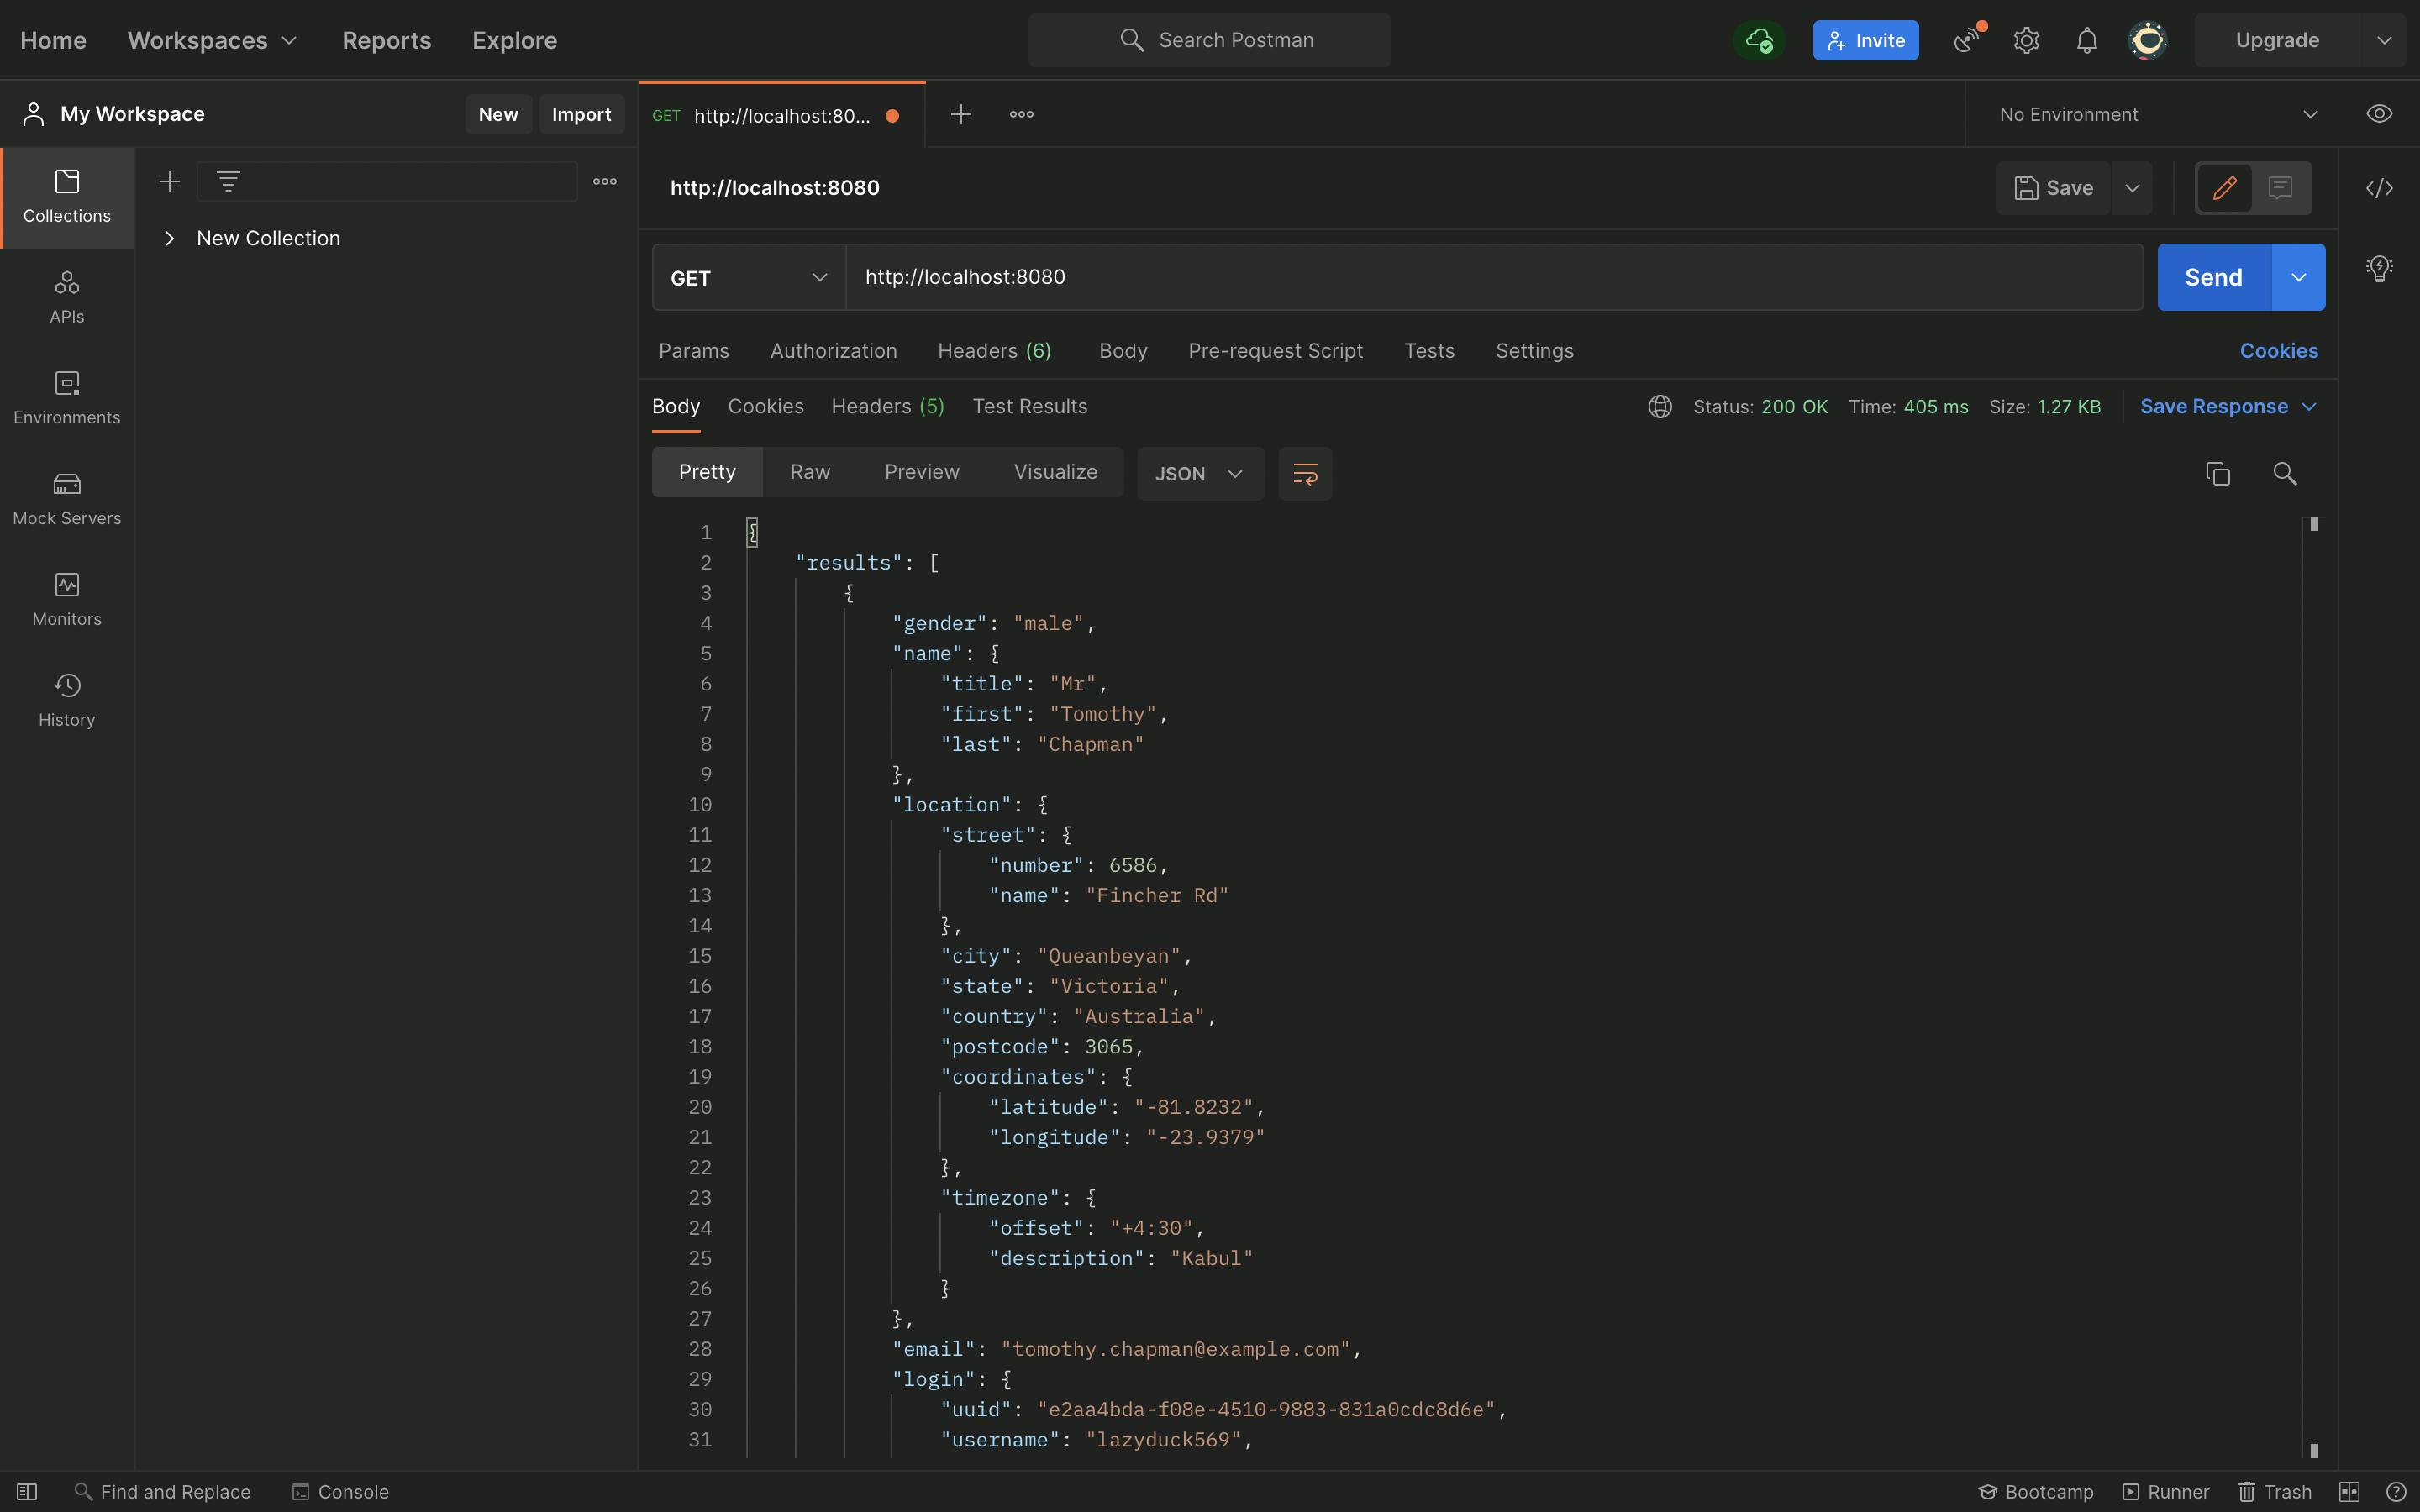
Alternatively, you can head to localhost:8080 on your local system and see the data!
As promised, let's move onto calling an external API using the WebClient.
POM.XML
Let's open our pom.xml file, which lies in the root directory of our project. We'll be adding the dependencies to work with WebClient here.
Under the list of dependencies add this:
<dependency>
    <groupId>org.springframework.boot</groupId>
    <artifactId>spring-boot-starter-webflux</artifactId>
</dependency>
By doing this, we've added the dependencies to work with WebClient!
If you're using IntelliJ Idea as your IDE, reload your project by right-clicking on pom.xml, and then
Maven->Reload project.
WebClient
What is WebClient?
WebClient is a reactive web class provided to us by the spring ecosystem to work with external APIs.
Why WebClient?
Java is a synchronous programming language and so is Spring and RestTemplate as well.
Sometimes we want to perform Asynchronous tasks and hence WebClient.
RestTemplate vs WebClient?
RestTemplate will be deprecated sometime in the future, doesn't seem anytime soon and there will be a migration to WebClient.
Should I learn WebClient?
It's not a necessity right now, so you could probably skip on it.
There's not a lot of resources on WebClient on the web right now, I might write another blog on WebClient.
With this, I shall call it off for the blog! Hope this was really helpful and in-case you're stuck you can definitely comment it out on this blog post and I will help you out 🙂